NEW ANNUAL CATALOG IS HERE!

NEW ANNUAL CATALOG IS HERE!
Your new products are available!

Monday, August 30, 2010

I have a confession....

It's been over 3 weeks since my last post - yikes!  Forgive me, friends.  Life has been super busy, as I'm sure it has been for you, too.  I left for vacation 2 days after my last post, came home, and have been busy getting my youngest child off to college.  It's official, I'm an empty nester!  Well, at least until she comes home for summer.  Here's a cute photo of my girls from our vacation.  We stayed on my Aunt's farm in Oregon.  The girls got a kick out of my 81 year old Aunt's 'gater.'  My Auntie drives it all over her farm - too cute!
Ok, so they had just a little fun on the farm!  lol

My daughter asked if I would make her some cards for her to take with her to college, so I'm beginning to make her a stash.  I started by casing this one from Elaine Schader's post on Stampin' Connection:

This uses the Friends Never Fade and Perfect Punches stamp sets.  Colors are Wild Wasabi, Marina Mist and Concord Crush.  So pretty together, don't you think?  A little organza ribbon, the Vintage Wallpaper embossing folder, Large oval and large oval scallop punches, and a Martha Stewart border punch (any of the SU border punches would work, too) makes the recipe for this card.  Again, this is pretty much a direct case.  Search Friends Never Fade at SC, and you'll find others that are similar to this one.

Katie also asked for some 'guy' cards.  All products are stampin' up accept for the Verve stamp set:

The Elegant Soiree DP and Crumb Cake paper were distressed, pierced and punched for this card.  I really like the Bashful Blue, Baja Breeze, Soft Suede and Not Quite Navy color combo!  The little ribbon loop is the reverse side of the Soft Suede polka dot ribbon.  If you don't have a distressing tool, you can simply use your fingernail on the paper's edge for a similar effect.

I'm on a card makin' mission during the month of September, and I'll be using lots of new goodies from the new Holiday Mini.  Your copy, if you are on my mailing list, is being sent to you this week so keep a look out in your mail.  It's one of the best occasion mini's I've seen with lots of new products!

I'll post the online link to the new Holiday Mini Catalog on September 1st.  Until then, make it a great day, making great cards and pages and projects and frames...and..... :)

Saturday, August 7, 2010

Oh, I LOVE new paper!

Paper is my inspiration.  How 'bout you?  When I saw the new designer paper in the new Stampin' Up! catalog Iabout fell over - I wanted it ALL! lol   I did purchase Woodland Walk and Blueberry Crisp (and a few others, I have to admit).  And, as is true for many of you... I have boxes of pictures that are waiting for me to find the perfect time to put them into a scrapbook.  Alas, I am not a very dedicated scrapbooker!  However, I really love my youngest daughter's graduation pictures, so I committed to making two pages last night, and thought it a perfect opportunity to play with my new paper!

Katie loves green, so I have to make a page with green paper and Woodland Walk was perfect.  Now, in hindsight, I would use one or two solid colors as matting, but that's how we learn, right?  :)  Here's the first page I did.  It's an 8 1/2 x 11 for a green album that I picked out over a year ago just for her:
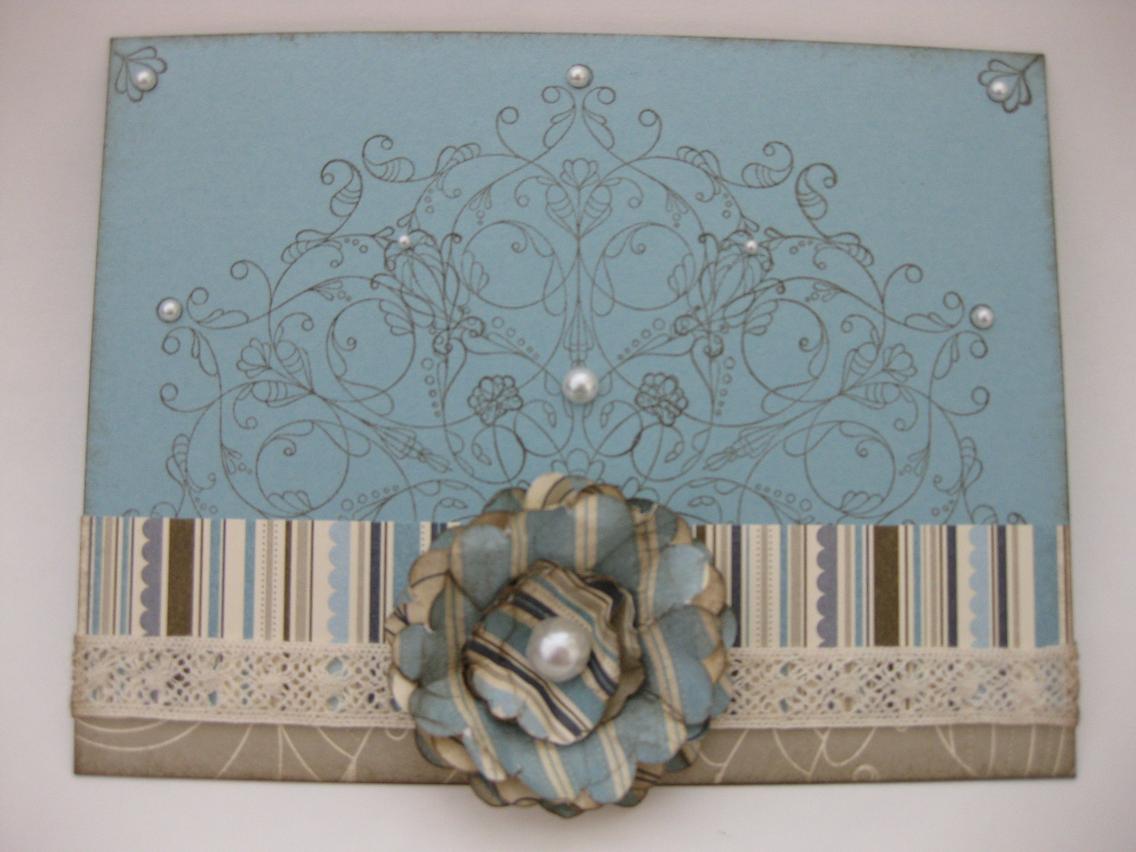
I used the Just Believe stamp set from the new catalog for the stamped images and the Whimsical Word set for the sentiment.  The lace ribbon is also from the new catalog.  It's hard to tell, but the flowers in the lower left corner are actually cut out from the paper and popped up on dimensionals.  I didn't have any Garden Green ribbon, so I substituted some Handsome Hunter instead.  I added some paper piercing and a few buttons for a little extra detail.  Here's the next one using Blueberry Crisp:


So I had alot of fun with this one!  Plus, I just love this picture of my daughter.  I cut the main piece of dsp to 81/2 x 11, and then added the 3 inch strip onto the left side of the page.  I covered the seam of those two pieces with some Pacific Point ribbon.  I then cut two pieces of dsp to 6x6 and set them diagonally as matting for the picture.  I cut a small strip of dsp and used a tape runner and adhered it to the crocheted ribbon, then adhered that to the page.  I covered the ends by punching two medium scalloped ovals, folding them over the sides of the page and securing them with Very Vanilla brads.  The sentiment in the bottom corner was stamped from the Style Beautiful set (again, a new stamp from the new catalog) on to Very Vanilla CS and punched with the large oval punch.  I punched a medium scallop oval from the dsp, cut it in half the long way, and adhered it to the top and bottom of the punch.  It's popped up on dimensionals.  Last, I had so much fun making the flower in the top corner.  Here's a close up:


First, I punched a scallop circle out of a different print of dsp than the one I chose to use for the rest of the flower.  Then I punched 4 'owl bodies' from the new Owl Punch - yeah, really!  I cut off the owl feet.  I then folded each owl in half lengthwise.  That crease is your guide to cut to the center from each of the owl's ears.  It should look like a tulip when you are done with this step.  Then from the bottom, fold each of the two edges from the center crease point.  Punch a 1" to 1-1/2" circle to adhere to the back of your 'owl tulips'.  Arrange them first so you know where to adhere them to the circle.  Then adhere the circle to the scallop punch that you set aside.  Use a paper piercer in the center of the flower to insert the brad.  The brad was made with Stampin' Ups Brad Builder.  Punch a 1/2" circle from the dsp you want to use.  The clear plastic cover already has adhesive on it so stick your circle to the back of it.  Then get a 1/2" glue dot, and put it on the brad base.  Then adhere the paper/disc to the brad base, paper side down.  Insert the brad and then use your fingernail or small scissors to lightly curl the flower tips upward.  You're done!  The flower was popped up on dimensionals, of course!  You can make these with 4 to 6 owl/tulips, depending on how deeply you fold up the outside edges of the owl/tulips.  The more narrow they are after folding, the more will fit in the circle.  These flowers are VERY fun to make and look awesome.  Add more dimension to them by inking the edges before the flower is assembled.  Well, I'm off to run my weekend errands.  Feel free to email me or comment, especially if you have questions about these pages, Stampin' Up products, or anything in general!

Wednesday, July 28, 2010

I'm holding an open house!

I've been invited to present Stampin' Up! Products at the Trendy Tulip Boutique this Thursday, Friday and Saturday.  I'm very excited to share many of Stampin' Up!s new products and to demonstrate our My Digital Studio software.  I can hardly wait!  Hope you can join me!  More information is available here:

Trendy Tulip Boutique!

Below is just one example of the Notecard Sets I will have on display:
Each set has 3 Birthday Cards and 3 Thank You cards contained in this cute little box!  I have several of these made using all different design paper.  This one uses the new Garden Gala DSP, Pumpkin Pie cardstock and ink, daffodil delight cardstock and the new pear pizzaz poly ribbon.  I heat embossed the sentiment with versamark and clear embossing powder, punched it with our large oval punch and popped it upon dimensionals.  Super easy, demonstrable and very cheery, don't you think?   I will also be displaying the wonderful card swaps I received at Convention.  It's wonderful to receive card swaps that use stamps that I don't have so I can display a wider variety of products.  I love that!  I'm off to prepare for this event.  Hope to see you there, and let me know if you saw this post and I will give away a free card!

Saturday, July 17, 2010

Do you know how much I love the Heat Embossing Technique?

It's probably my FAVORITE stamping technique!  I also love the effects of brayering.  I wanted to combine these two techniques in a set of card fronts for swapping at the Stampin' Up! convention.  I went back to some cards I've made in the past, and updated them with new stamps and new colors from the very exciting 2010 - 2011 Stampin' Up Catalog.  Here's what I came up with:

As soon as I saw the Silhouette Sentiments hostess set, I knew I wanted it!  You can get this set FREE when you host a Stampin' Up stamp camp or party.  Leave me a comment if you would like to host a card making class.  I would LOVE to teach you and your friends how to make cards just like this - it's easier than it looks!  The flowers were first stamped with black ink and versamark and then heat embossed with clear embossing powder.  I then punched a 1 1/4" circle out of a post it note to mask the paper so a sun is created.  I first used daffodil delight and peach parfait with a brayer for the sky.  I sponged cajun craze across the top and down the sides.  The hills were created by tearing the sticky edge of a long post it note in the shape of the hills.  I covered the sky with it, then brayered cajun craze across the bottom.  I finished the bottom by sponging early espresso at the bottom edge.  A white gel pen was used to bright up the centers of some of the flowers.  Yes, white gel pen drys on the top of embossing - go figure.  Markers do not do this, only gel pens.  Cool!  I used my stampamajig (love that thing) to align my sentiment into the sun after removing the post it note mask.  Brads were added and then it was mounted on to Cajun Craze cardstock.  I made six of these in about an hour and a half.  I know, right?  It really goes pretty quick!  Hope you'll try that brayer and heat gun you have stashed in a back drawer and share what you create!  Have a beautiful day!

Tuesday, July 13, 2010

Always Elegant - Multi-Stamp!

Sometimes I forget how versatile stamps can be and just stamp the image as it is.  So, I really enjoyed using this main image stamp from Always Elegant and stamping it three times to give it a whole new look.  This was also my first shot at paper flowers and using the new cotton lace from Stampin' Up.  This a card front that will traded at Convention:

I had lots of fun making this!  Colors used are Baja Breeze, Soft Suede, Crumb Cake and Very Vanilla, all from the Elegant Soiree DP.  Soft Suede is the only ink used here, on the main image, flower and edges.  The pearls and ribbon are also new fom Stampin' Up!  There is no sentiment, as I don't usually put sentiments on card exchanges so that people can use them for what fits their needs.  I'm off to ride my bike - have a creative day!

Monday, July 12, 2010

Card Fronts for Convention

I've been busy getting ready for card swaps at the Stampin' Up Convention.  This is my first year to attend and I'm excited to be able to go this year!  My upline, Chelsea, has advised me to make card fronts just to exchange casually.  So here's what I've come up with so far:
Elegant Soiree DP was used here, with Crumb Cake, Marina Mist and Soft Suede.  Curly Label Punch, Scalloped Oval Punch Corner Rounder and Small Oval Punch were also used.  I love the new Elegant Lines Embossing Folder too!  It was used on the main image mats.  Awash with Flowers Stamp set was used for the main image, and Elements of Style was used for the sentiment.
I really like this card!  Pear Pizzaz "paired" with Cherry Cobbler is a yummy treat!  I love love love the tree image from the Snow Swirls set!  It is embossed, with little touches of dazzling diamonds and a dash of bling to top the tree and the sentiment from Delightful Decoration.  Early Espresso and Very Vanilla cardstock were also used, along with the scallop border punch, 1" punch, 3/4" punch and Vintage Wallpaper embossing folder.This one uses 3 stamp sets:  Elements of Style, Vintage Vogue and Greenhouse Garden.  Crumb Cake, Very Vanilla, Marina Mist, Wild Wasabi and Soft Suede were all used as Ink for this project.  The Very Vanilla is craft ink, which I used around the edge of project to soften the edges.  I really like the little pearl flower center alot!

I think this one might be my favorite!  I used Wild Wasabi, Marina Mist (crazy about this color) and Very Vanilla as cardstock and Inc.  I again, like to use the Craft Very Vanilla to sort of 'antique' the edges of these vintage style images.  The flourish and flowers are both from Elements of Style.  The flower image was stamped in black stazon, and then colored with blender pens.  I finished off the panel edges with a light coating of blank ink and the ticket punch!  I thought this could be used for almost any occasion!

I have more cards and projects to post later this week, so post your thoughts here, share your casings and come back later in the week for more convention projects, cards for fundraisers and more new items from the Stampin' Up catalog!  Make it a creative day!

Tuesday, July 6, 2010

Sweet Pea Baby!

Marie Shaughnessy originally posted this card on stampinconnection.com.  I loved it just the way she made it, so it really is a direct Case!  There's ALOT of detail here, but oh so much fun and such a cute result:
and the inside:

I embossed, punched, sponged and stamped to my heart's content!  I put in to play the Orchid Opulence and Lovely Lilac with Old Olive and Always Artichoke for anything green.  Blush Blossom was used for the baby face.  Stamps used are the flourish from Baroque Motifs, outside sentiments are from Tiny Tags and the flowers were stamped with Itty Bitty Bits.  The punch is from the Itty Bitty Bits punch set, along with the word window and medium oval punches.  3/4" and 1/2" punches were used for the peas and face, and the leaves were trimmed down from the two-step bird punch.  The flourish was clear embossed and the butterflies are all from the butterfly embosslit.  A white gel pen (Stampin' Up! really does sell the best one I've ever found) was used for all the highlights.  So cute!  Thanks for looking!

Sunday, July 4, 2010

Brayered Father's Day

Oops!  I forgot to post this one before Father's Day!  Ah well, thought you might like to check it out, and then case this card to a masculine birthday, get well or sympathy card:
I know, forgive me - it's not 100% Stampin' Up products... however there are many sentiments that fit the curly label punch perfectly!  So here's he details:  I used an Early Espresso base card, with a Marina Mist mat.  I used very vanilla, and brayered Crumb Cake and then a little Early Espresso, being careful to not cover all of the Crumb Cake.  I turned the card around, and brayered Bashful Blue with Marina Mist on top.  I used my grass stamp from Inspired By Nature and used Old Olive to stamp it at a slight angle.  I used my ever handy slot punch (love that thing) to make the cattails.  The little birds are optional and could be substituted with the solid small butterfly in the Charming set (which I currently do not have.)  Here's the inside of the card:


The left side is stamped directly on to Marina Mist, using the same techniques as the front of the card, except for brayering the blue inks.  I used Crumb Cake for a computer generated sentiment, compliments of a quote from Bill Cosby.  Hope you can take this Father's Day card and turn it into something you can use for Birthdays, Sympathy, Get Well, or well, anything!

Friday, July 2, 2010

From the new catalog.... so fun!

Aren't new toys FUN!?  New colors, stamps, punches and always lots of fresh ideas await you in the new Stampin' Up! catalog!  Remember that many of the new stamps and colors are available for My Digital Studio as well!  Want more information on digital crafts?  Email me!

Below is a rather quick card I made for one of my clients.  Hydrangeas grew in my backyard when I was a child and they bring back many fond memories of good times in that backyard!  My mother showed me how to add colored water to the base of the bush to change the color of the hydrangea, so in her honor, I went with a red hydrangea, just like we used to 'make at home!'  Details are below.  Enjoy, create, and have a fabulous 4th of July weekend!
and for the inside:

Almost all NEW products were used for this card:  My base card is Early Espresso cardstock, layered with Pear Pizzaz that has been dry embossed with the new Vintage Wallpaper folder.  The Cherry Cobbler strip was border punched with the scallop punch.  Early Espresso was used for the main image mat.  Watercolor paper makes the main image mat because it works so well with the blender pens.  I used Cherry Cobbler to stamp the flower and was careful to load ink on only the flower portion of the stamp.  The stem was colored with my Pear Pizzaz marker.  I used a blender pen and just a little extra ink to color the image for more depth.  Cajun Craze marker was used to color the centers of the flowers.  I used my Cherry Cobbler marker to color only two images of the line design and stamp them in opposite corners.  The sentiment and hydrangea are from the new "Because I Care" set.  The sentiment was heat embossed with versamark and clear powder.  The inside used Very Vanilla mats, and the same components as the outside of the card.  I just might make a few more of these! 

Tuesday, June 29, 2010

Welcome, new followers!

Just wanted to shout out a big "Welcome" and "Thank you" to my followers!  It's so fun to see your pics show up each morning, eagerly greeting me and inspiring me to make something for you to enjoy and re-create as your own!  Thanks for stopping by and feel free to leave a comment or a message and let me know what you like best and if there is something you would like to see me create!  Have a fantastic day!!!

Monday, June 28, 2010

Congrats to my Sis!

Can I just say, I'm loving the new colors and this Garden Gala design paper!  Can't wait for it to be available to everyone July 1st!  My sister got the job she wanted teaching 2nd grade and I couldn't be happier for her!  As a gift, I'm giving her the Teacher's Pet stamp set and some classic ink pads and stampin' spots, along with this card:

and here's the inside:

I really like the way it turned out!  Here we go on the details:  I used Daffodil delight as my base card, and the Garden Gala design paper for all printed paper.  Cherry Cobbler, Marina Mist and Pear Pizazz were also used as card stock and ink.  I realized later that actually, I think this paper may use Real Red and not Cherry Cobbler, but it still looks ok to me!  Four stamp sets were used:  The new Friends Never Fade was used for the flower.  I colored it with markers first, stamped it, then colored again with a versamark pen and heat embossed it.  Wonderful Favorites was used for the outside greeting, and 'the best is yet to be' is from the Best Yet set.  I didn't have any Pear Pizzaz ribbon - yet... but I will!  I used some miscellaneous ribbon that came close enough until I get the real thing!  There really isn't alot of embellishments on this card - It's pretty simple with lots of layers and color.  Funny, that's how I could describe my sister, colorful with lots of layers! 

Saturday, June 26, 2010

For You - originally


June has grown wings and flown by!  So much happening in my world this month - it's left me little time to create.  I did sneek some time in to purchase some new sizzix dies and wanted to share this creation with you.  As some of you may know, I'm more of a 'case and renovate' girl, but I'm proud to say this one is an original and I'm pleased with the results.  Hope you like it!

I used Crumb Cake, Cherry Cobbler and Whisper White cardstock, Crumb Cake, Early Espresso, Craft White and Cherry Cobbler ink.  Elements of Style, Vintage Vogue and Artist Etchings were my stamps of choice.  I used a distressing tool for the edges of the cherry cobbler matt after running in through an embossing folder.  I then crumpled the matt, smoothed it, and adhered it to the base card.  The big note die was used on Crumb Cake CS, stamped along the edge with a Vintage Vogue stamp, then dusted the edges with Craft white topped off lightly with Early Espresso.  I used another sizzix die to cut the WW and then edged it with Crumb Cake and Early Espresso before using versamark, clear embossing powder and Cherry Cobbler ink for the main image from Artist Etchings.  It was then mounted with dimensionals.  I stamped the round image and punched it out with the 1 3/4 punch, then used a stencil I had for the 2 inch circle matt.  I distress the 2 inch circle a bit, too.  The 'for you' image from Elements of Style was embossed on WW, then punched with the small oval punch and mounted with dimensionals.  The brads are miscellaneous one I had that just so happened to match my ink - yay for miscellaneous brads!  Can't wait to get the 'real deal' from the new catalog!  The ribbon is white organza that was wrapped around the corner and adhered to the inside of the card.  I created more dry-embossed panels for the inside of the card that covered the brad backs and the ends of the ribbon.  Voila!  I had a great time and can't wait to give this to someone for any occasion.
Thanks so much for visiting my blog today.  I hope it inspires you to create your own original or a case of this one!

Tuesday, June 15, 2010

A favorite technique - Emboss Resist

Morning Stampers!

I continue to practice my sponging and brayering techniques, and thought I would like to case something of Michelle Zindorf's and adapt her work to some of the new colors and stamps available at Stampin' Up!.  I am loving the Friends Never Fade stamp and the cherry cobbler color especially.  After surfing Michelle's website, I chose this card:


and updated it with Cherry Cobbler, Delightful Daffodil, Crumb Cake and Early Espresso, while using the new Friends Never Fade and Elements of Style Stamp sets:


The flower image was stamped first by coloring the stamp with markers.  I then colored them again with Versamark and embossed them.  After that, I used only versamark to stamp the flourishes around the edge and then embossed those as well.  I covered a 3" square in the middle, and then sponged Early Espresso along the edges, then wiped the ink of the flourishes.  I removed the 3" mask and lightly sponged the center with Crumb Cake.  I then took a ruler and the Early Espresso marker and defined the 3" square on the left and bottom edges to make the center pop a bit.  I used a little trick for the ribbon:  I tied my ribbon around a book first, then cut the ribbon in the back so I could position my bow/knot exactly where I wanted it, and then used snail adhesive to attach it to the back of the card front.  I used the Modern punch and some misc. brads to accent the red in the flowers.   I left some open space above the flowers so I can add a sentiment when I decide what occasion I will eventually choose for this card!  This was a fun card to make!  I'm looking forward to trying something similar with different stamps and colors.  Enjoy!

Monday, June 14, 2010

News Stamps for Preview of the New Catalog!


New catalogs are always so much fun!  The new Color Renovation at Stampin' Up has also been very exciting.  I'm having a blast playing with new paper, stamps and markers. 

I used all of the new In Colors for this cute little card that could be used for a birthday, congratulations or encouragement.  "Best Wishes"is such a versatile sentiment, don't you think?

I used the slit punch, daisy flower punch, and the Itty Bitty Buttons that go perfectly with the Itty Bitty Bits stamp set.  It's so nice to work with materials that coordinate so well together.

I'll be posting another creation made with some of the new colors from the color renovation, and another new stamp set!  Off to the 'day job' for now.  Happy Stamping and thanks for lookin'!

Saturday, May 15, 2010

Brayering and Awash With Flowers

I thoroughly enjoyed my Brayering Classes with Michelle Zindorf in Boise, Idaho a few weekends ago.  We were asked to practice brayering.  I kept my practice piece, and then came home and added some images from Awash with Flowers and a butterfly stamp I had laying around.  I tossed in a miscellaneous button, ribbon and simple sentiment.  I really enjoyed putting this together!  The colors are some of my favorites:  Bashful Flue, Old Olive, Pink Pirhouette.  The design paper mat is from Bella Birds.  Hope this rather quick card inspires you to pull out your brayer today!